Hibernate Tutorial using Gradle Build Tool
In this Tutorial, we'll be walking through on how to setup the Hibernate Project using Gradle Build System.
Step1: File -> New -> Other -> Gradle Project -> Give the name for the Project -> Finish.

Step2 : Our Project Structure would be now looking as below

Step 3: Now let's start with the creation of Config File (.cfg.xml) at src/main/resources directory along with the Hibernate Configuration Console (this helps in validating our connection against db)
i) .cfg.xml Creation
Select src/main/resources/org/gradle directory -> Right Click -> Hibernate Configuration File -> Give the name for .cf.xml -> Click Next and we will get the Window. Fill the Connection details as below.

We ought to make sure if Create Console Configuration option is checked at bottom as shown in picture above -> Click Next
ii) Console Configuration Creation
Once we click Next in above Window, we'll be taken towards another dialog to fill in the details for Console Configuration as shown below:
In the Main Tab, provide the Hibernate Version value as 4.0 and proceed to Options Tab.

In the Options Tab, provide the Database Dialect value as Oracle 10g and move to Classpath Tab.

In the Classpath Tab, click the button Add External jar and add the ojdbc jar as below and click Finish

Step 4: We gonna save objects into the Table named person having a column named id. So Let's create a POJO named Person with a variable named id.
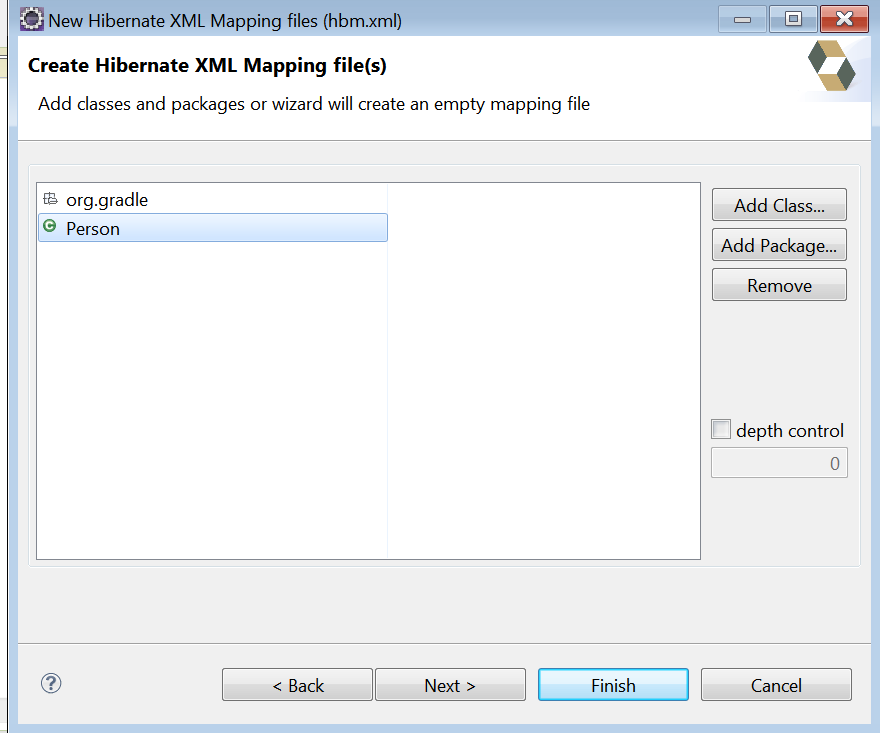
Step 5: Now Let's create a Mapping Xml .hbm.xml. Select the directory src/main/resource/org/gradle -> Right Click -> New -> Other -> Hibernate XML Mapping File -> Next-> Add Class -> Add Up the POJO created in step 5.
Step 6: Now we ought to make an entry in .cfg.xml for the .hbm.xml. Select the .cfg.xml ->Select Session Factory Tab at bottom -> Select Mapping -> Click Add Button -> Add the POJO.

How do we test if our mapping are right?
Select Hibernate Configurations Tab -> Select the Project -> Database -> Look for the Table which was mapped -> Right Click Table -> Select HQL Editor ->
Execute the Query as
select id from person
It would normally throw error as
Error
Fri Feb 13 15:59:12 IST 2015
org.hibernate.hql.internal.ast.QuerySyntaxException: person is not mapped [select count(p) from person p]
The reason is that w.r.t HQL, we should use the POJO names and not the actual table names.
Now reexecute the Query as and it would execute fine
select id from Person
Step 7: Create a Main Entry Class i.e class with public static void main(){}
Step 8: Now time to make entries in Gradle to complete the Project Setup
i) Include the reference for the Hibernate Dependencies.
- Refer the path fetching the Gradle Dependency http://mvnrepository.com/artifact/org.hibernate/hibernate-gradle-plugin/4.3.8.Final

- org.hibernate:hibernate-gradle-plugin:4.3.8.Final -> Includes three vital Components - group:name: version. Hence it should be included in the gradle build file as below:

ii) Refer the entries for the ojdbc jars as below.
- Make a directory named libs under main project directory and place the jdbc jar within. The structure should now be looking as below

- Now refer the jdbc jar from build.gradle as compile files(libs/jdbc.jar) under dependency section as below

iii) Now load the dependencies specified in the gradle file by navigating through Select Project -> Right Click -> Gradle -> Refresh Dependencies.
iv) Specify the Entry Point of the Application. This helps in executing the jars build by Gradle as the build System knows which is the Entry Point for the Application.

v) Specify that while building up the Jar export all the dependency jar Files along with. This helps in running the application smooth.

Step 9: Now place the below source code at org/gradle/TestHibernate
public static void main(String[] args) {
// TODO Auto-generated method stub
Configuration conf = new Configuration().configure("org/gradle/hibernate.cfg.xml");
ServiceRegistry serviceRegistry = new StandardServiceRegistryBuilder().applySettings(conf.getProperties()).build();
SessionFactory sf = conf.buildSessionFactory(serviceRegistry);
Session session = sf.openSession();
Person p = new Person(1111);
//p.setId(3421);
session.persist(p);
org.hibernate.Transaction transact = session.beginTransaction();
transact.commit();
session.close();
System.out.println("Done");
}
In the above snippet the relative path for .cfg.xml is given as
Configuration conf = new Configuration().configure("org/gradle/hibernate.cfg.xml");
How our Application detects this path?
Select Project -> Right Click -> Properties -> Build Path -> you can find the resources directory added to the Class Path

Hence the path for directories within src/main/resources directory or java directory is specified as org/gradle/hibernate.cfg.xml
Step 10: Build the Project using Gradle and once done execute the jar file using the below command
E:\Workspace\KeplerWorkspace\SampleHibernate\build\libs>java -jar SampleHibernat
e-1.0.jar
Hurrah ! We did it !
E:\Workspace\KeplerWorkspace\SampleHibernate\build\libs>java -jar SampleHibernat
e-1.0.jar
Hurrah ! We did it !
No comments:
Post a Comment